
PandoraNext项目地址:https://github.com/pandora-next/deploy
spug项目地址:https://github.com/openspug/spug
飞书:https://www.feishu.cn/
1. 通过spug创建一个任务计划

2. 添加shell命令
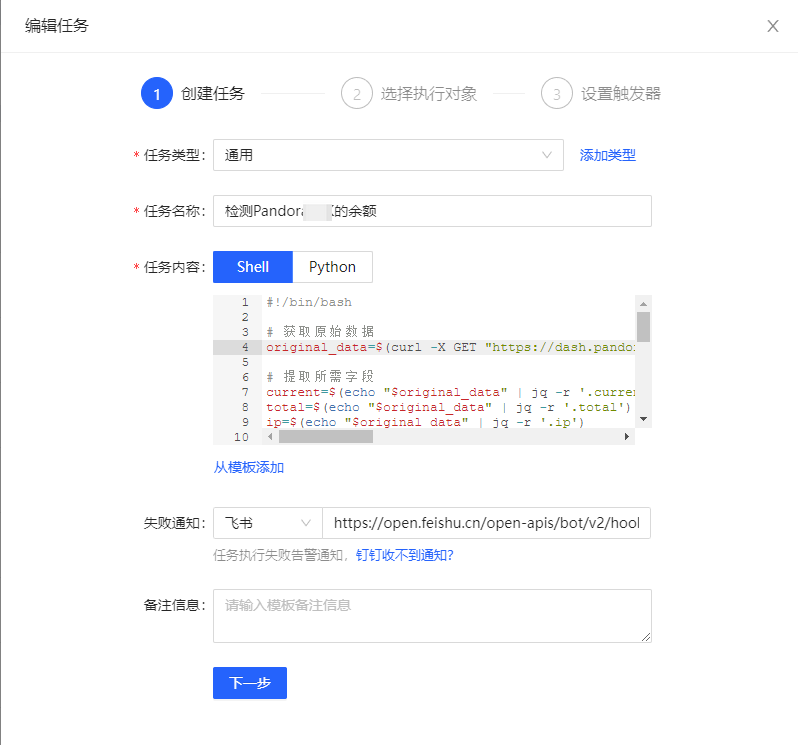
命令如下
其他的webhook地址可能有自己的要求,根据需要微调
#!/bin/bash
# 获取原始数据
original_data=$(curl -X GET "https://dash.pandoranext.com/api/UMSgTxxxpHWqU/usage")
# 提取所需字段
current=$(echo "$original_data" | jq -r '.current')
total=$(echo "$original_data" | jq -r '.total')
ip=$(echo "$original_data" | jq -r '.ip')
license_id=$(echo "$original_data" | jq -r '.license_id')
ttl_seconds=$(echo "$original_data" | jq -r '.ttl')
# 将秒数转换为小时、分钟、秒
hours=$((ttl_seconds / 3600))
minutes=$(( (ttl_seconds % 3600) / 60 ))
seconds=$((ttl_seconds % 60))
# 格式化重置时间
reset_time="${hours}H${minutes}M${seconds}S"
# 构建新的消息体,使用 \n 进行换行
formatted_message='{"msg_type":"text","content":{"text":"Pandora余额 \n用量:'"$current/$total"'\n许可IP:'"$ip"'\nlicense_id:'"$license_id"'\n重置时间:'"$reset_time"'"}}'
# 使用 curl 发送请求
curl -X POST -H "Content-Type: application/json" -d "$formatted_message" https://open.feishu.cn/open-apis/bot/v2/hook/e919axxxxxxec1
# 输出新的消息体
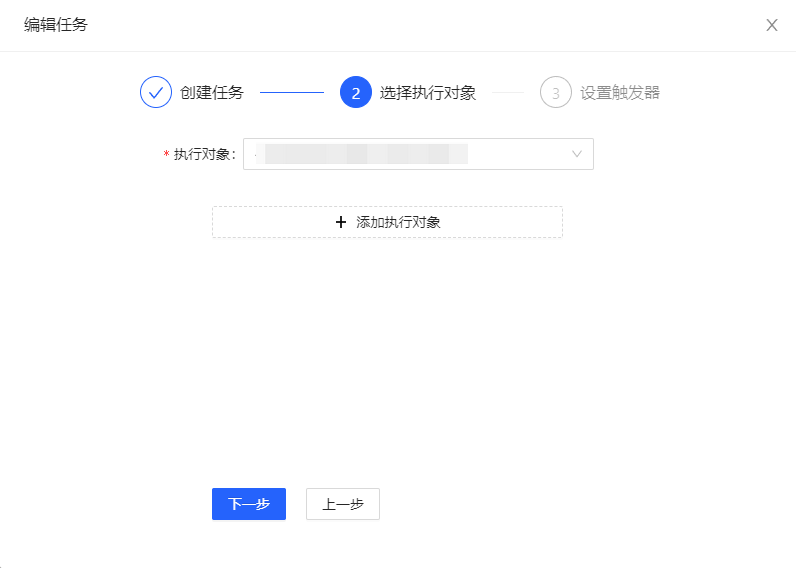
echo "新的消息体:$formatted_message"3. 选择执行对象
需要是安装PandoraNext项目的机器
4. 设置运行规则
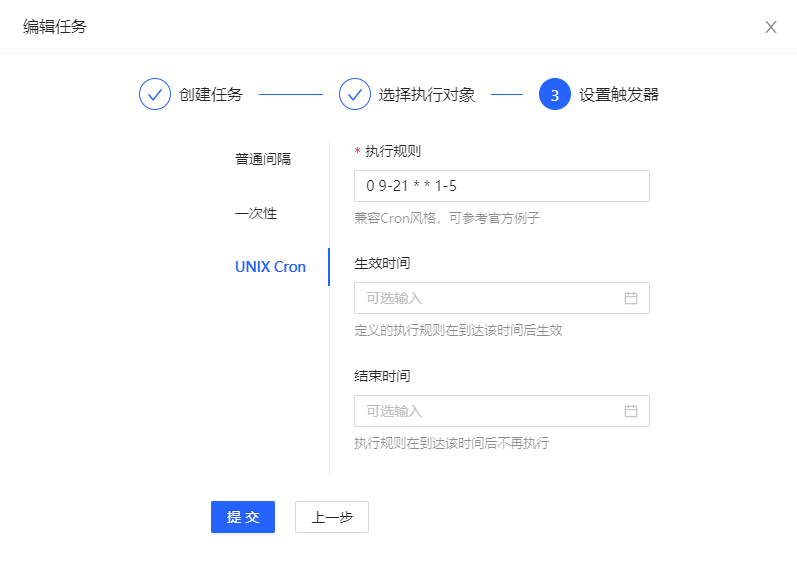
0 9-21 * * 1-5如果觉得太频繁,可以改成2个小时一次
0 9-21/2 * * 1-55. 执行测试,并激活任务

6. 成果展示

PS:如果执行提示 jq: command not found
需要安装jq(jq 是一个用于处理 JSON 数据的命令行工具)
在 Ubuntu 或 Debian 上安装 jq:
sudo apt-get update
sudo apt-get install jq
在 CentOS 或 RHEL 上安装 jq:
sudo yum install jq在 macOS 上安装 jq(使用 Homebrew):
brew install jq如果安装jq报错
[root@1panel ~]# sudo yum install jq
已加载插件:fastestmirror, langpacks
Loading mirror speeds from cached hostfile
 * base: mirrors.ustc.edu.cn
 * extras: ftp.sjtu.edu.cn
 * updates: mirrors.ustc.edu.cn
没有可用软件包 jq。
错误:无须任何处理
执行下面3条命令
sudo yum update
sudo yum install epel-release
sudo yum install jq
评论区