
Fix OpenAI and ChatGPT API Access with Cloudflare Workers
This post was translated from Chinese by AI. If anything reads oddly, the Chinese original is authoritative. 中文原文
ChatGPT has certainly proved popular—so popular that its API earned the GFW's “seal of approval” as soon as it launched. On Twitter, I saw many people struggling to access OpenAI's API. The most common solution is to use a server as a reverse proxy, but that adds extra costs. We ran into a similar issue at work before, and my boss found a pretty good, almost zero-cost solution. I tried it again, and it still works for accessing OpenAI's API, so I thought I'd share it here.
The idea is to use Cloudflare Workers to proxy OpenAI's API and pair it with your own domain so you can access it from mainland China. Cloudflare Workers offers a free allowance of 100,000 requests per day, and you can also register a domain for free, so this is practically a zero-cost solution. In theory, this method works for any website with the GFW's “seal of approval,” not just OpenAI.
You'll need the following:
A domain that hasn't received the GFW's “seal of approval” (if you don't have one, you can register one for free at https://www.freenom.com. ⚠️ Someone on Twitter pointed out that freenom has suspended new user registrations, but registering a domain should be straightforward enough)
A Cloudflare account (you can sign up now if needed)
⚠️ Please don't use the example addresses in this tutorial directly, as they may be shut down at any time. Don't use untrusted addresses set up by other people either, as your api key could be stolen.
🆕 Move Your Domain's NS to Cloudflare
Skip this step if your domain is already hosted on Cloudflare.
⚠️ As someone pointed out in the comments, Cloudflare Workers only supports custom domains hosted on Cloudflare. I've hosted my domains on Cloudflare for years, so I overlooked this detail. You'll need to move your domain's NS to Cloudflare first. If you'd rather not move your domain to Cloudflare, consider other methods, such as an nginx reverse proxy or a Docker container 🥲.
If you don't have a Cloudflare account, sign up for one. I won't go into the registration details here. After signing up or logging in to the Cloudflare dashboard, click “Websites” in the sidebar, then click “Add a Site” to start moving your domain to Cloudflare:

Enter the domain you want to move in “Enter your site (example.com)”, then click “Add Site”:
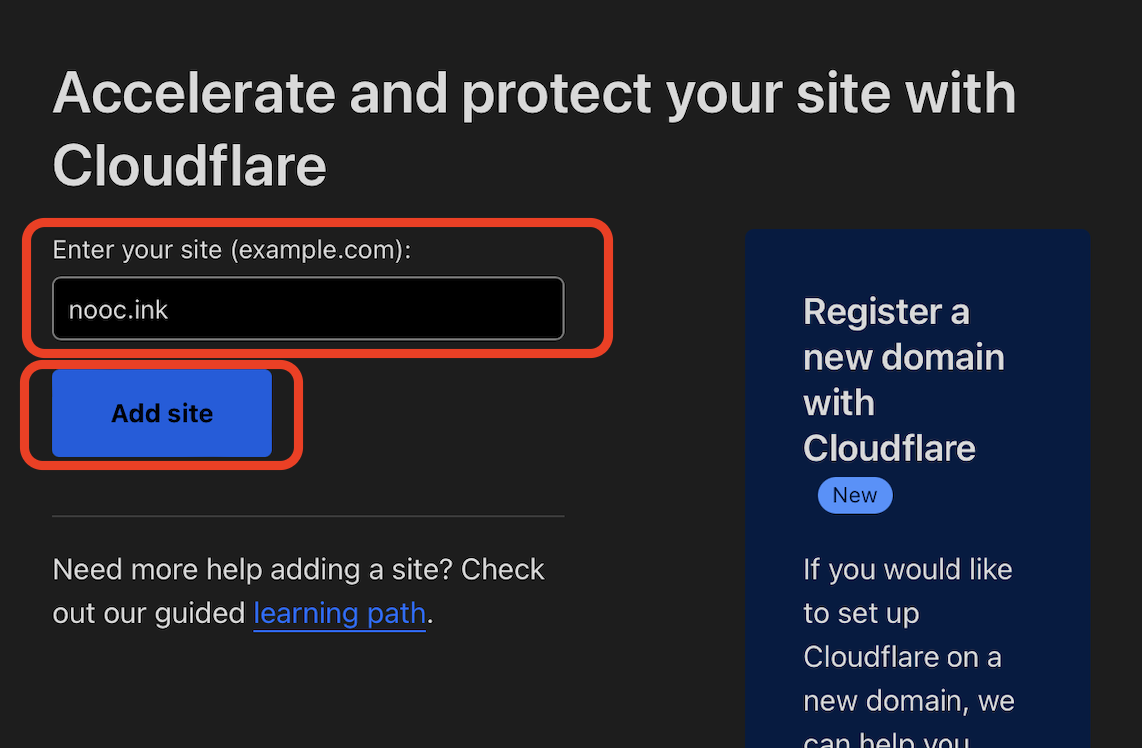
Follow Cloudflare's instructions to change the NS at your domain registrar to the addresses specified by Cloudflare. Once DNS resolution is working, you can continue with the next steps.
Create a Cloudflare Worker
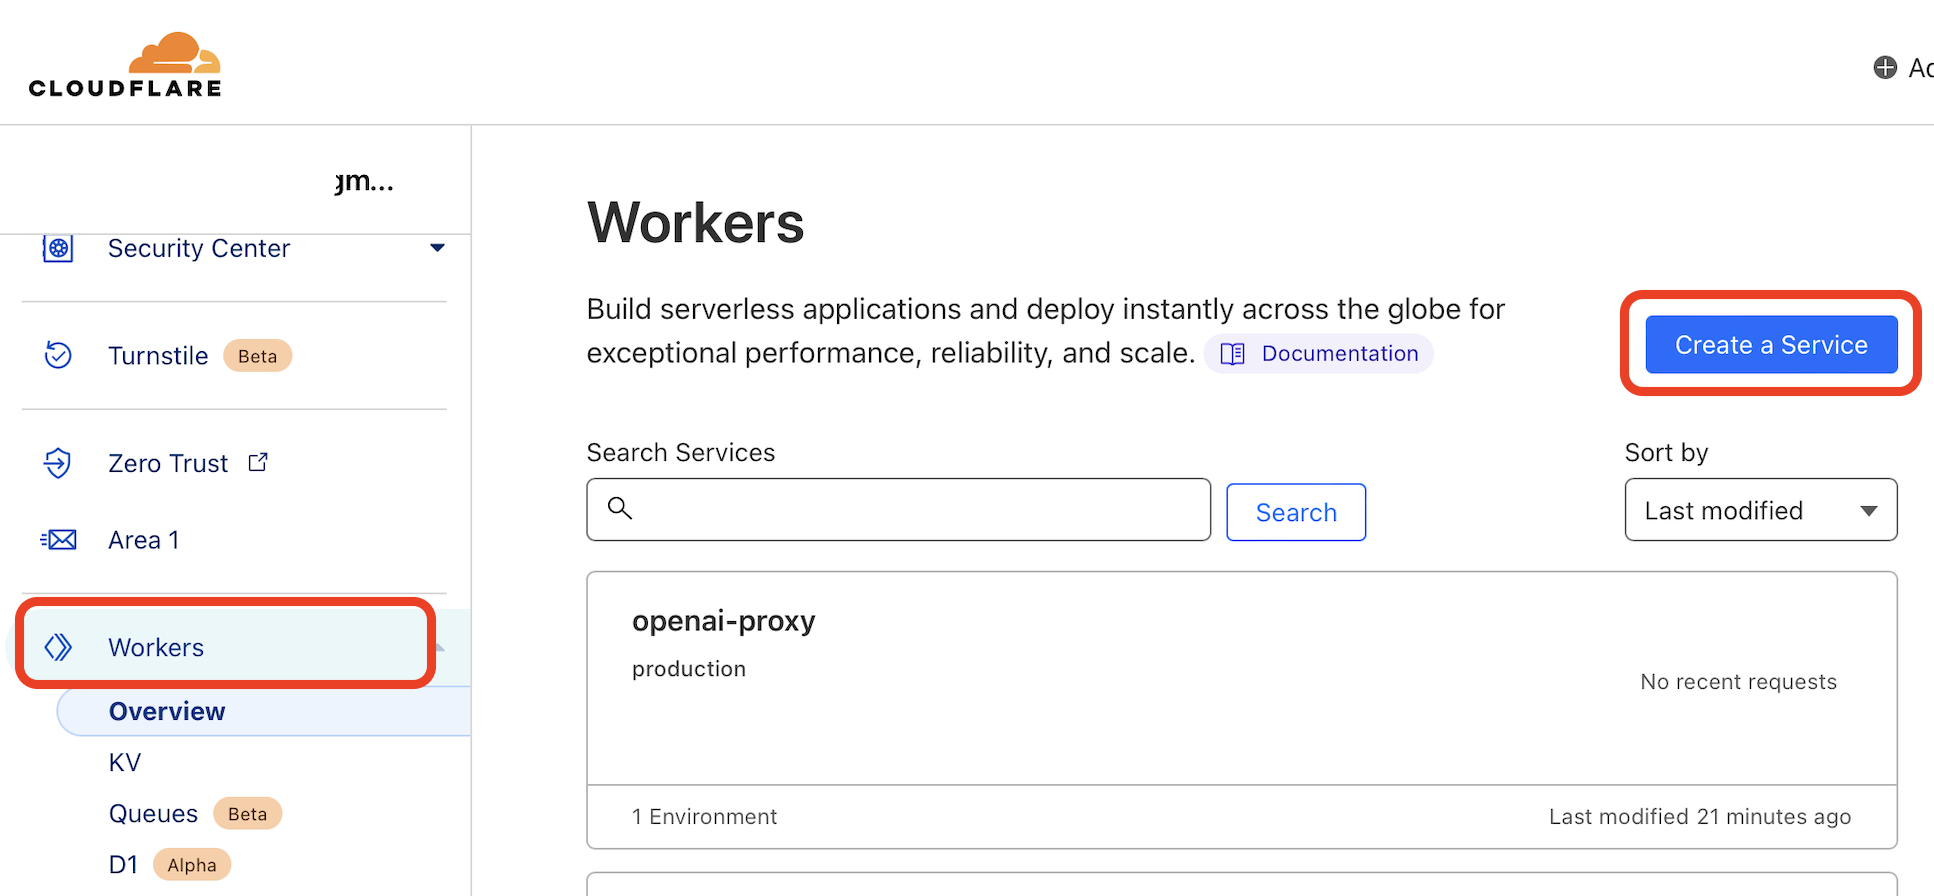
Log in to the Cloudflare dashboard, click “Workers” in the sidebar, then click “Create a Service” to create a Worker.
Enter a “Service name” on the creation page, then click “Create Service” to create the Worker. Leave “Select a starter” as it is for now.
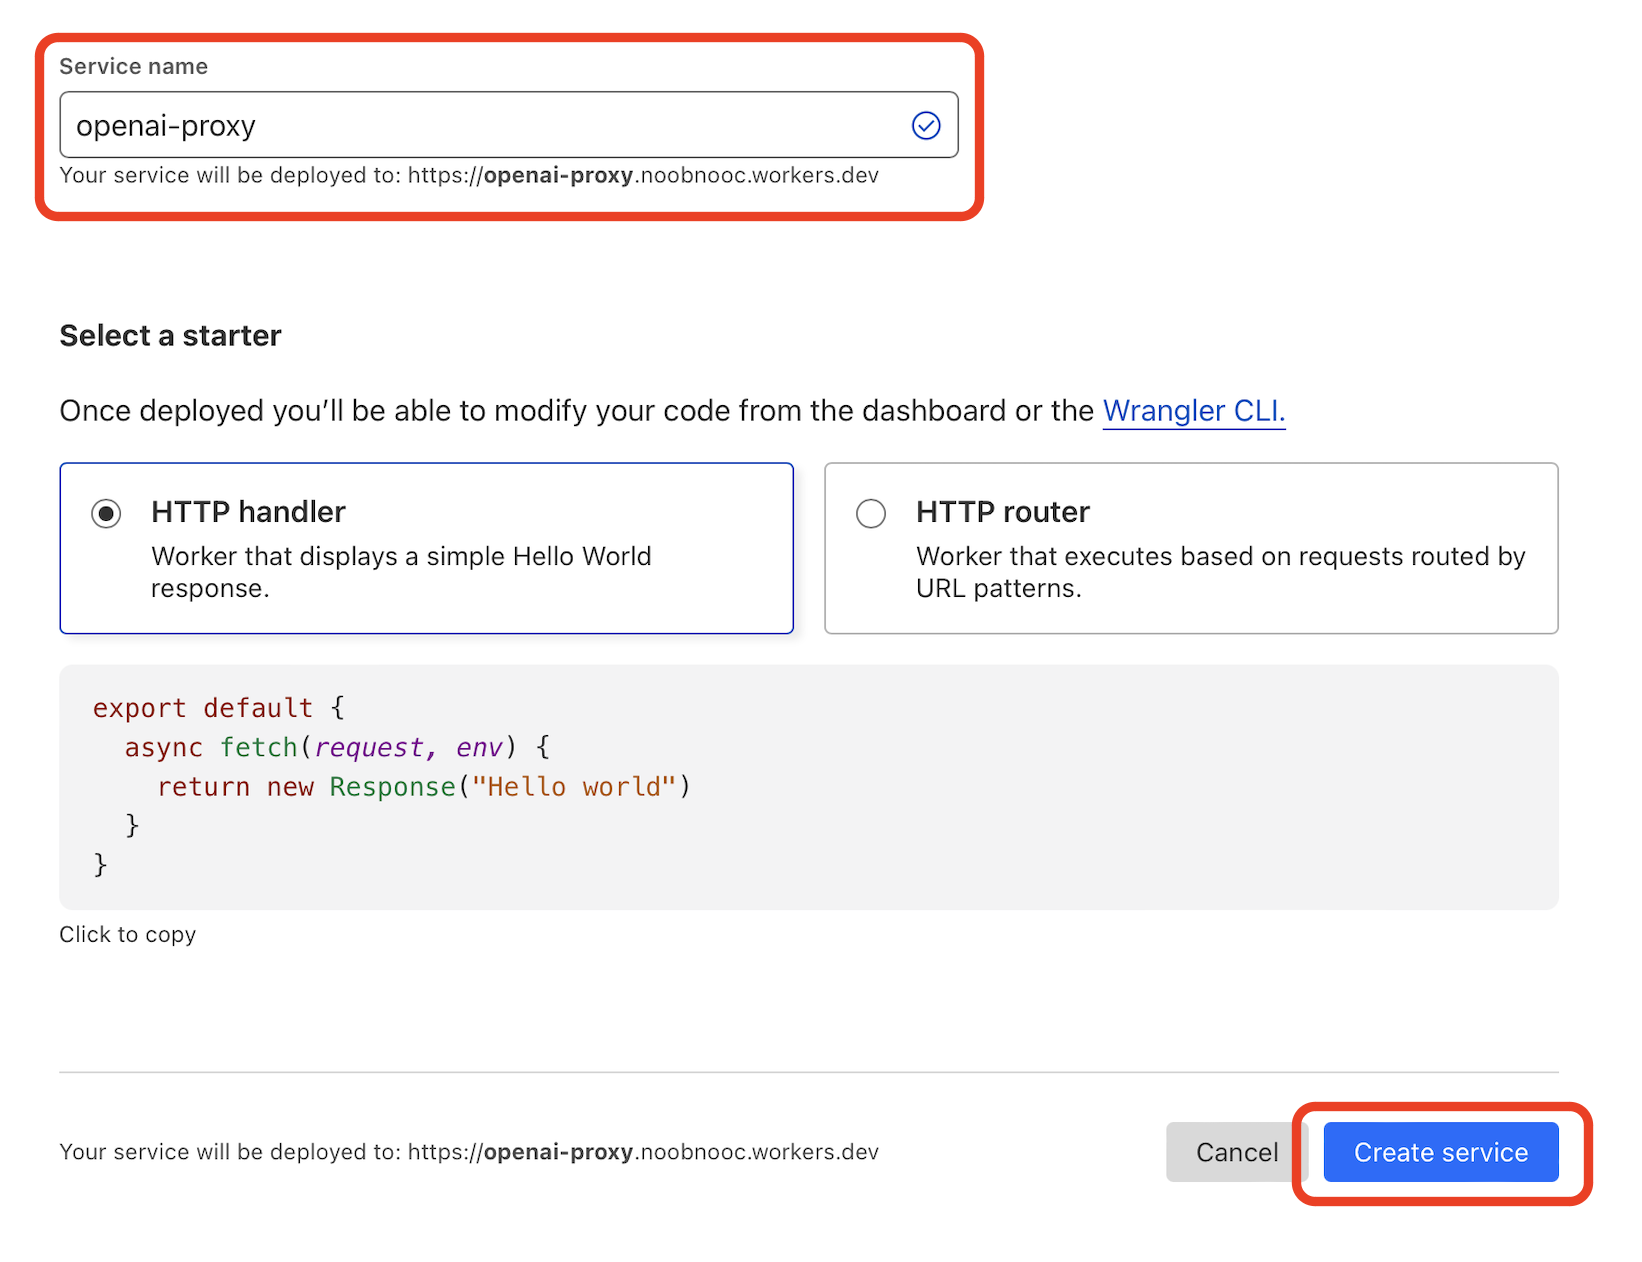
Your Cloudflare Worker is now created. Next, we'll modify its code so it can proxy OpenAI's API.
Modify the Cloudflare Worker's Code
On the Worker's management page, click “Quick Edit” in the upper-right corner to edit its code.
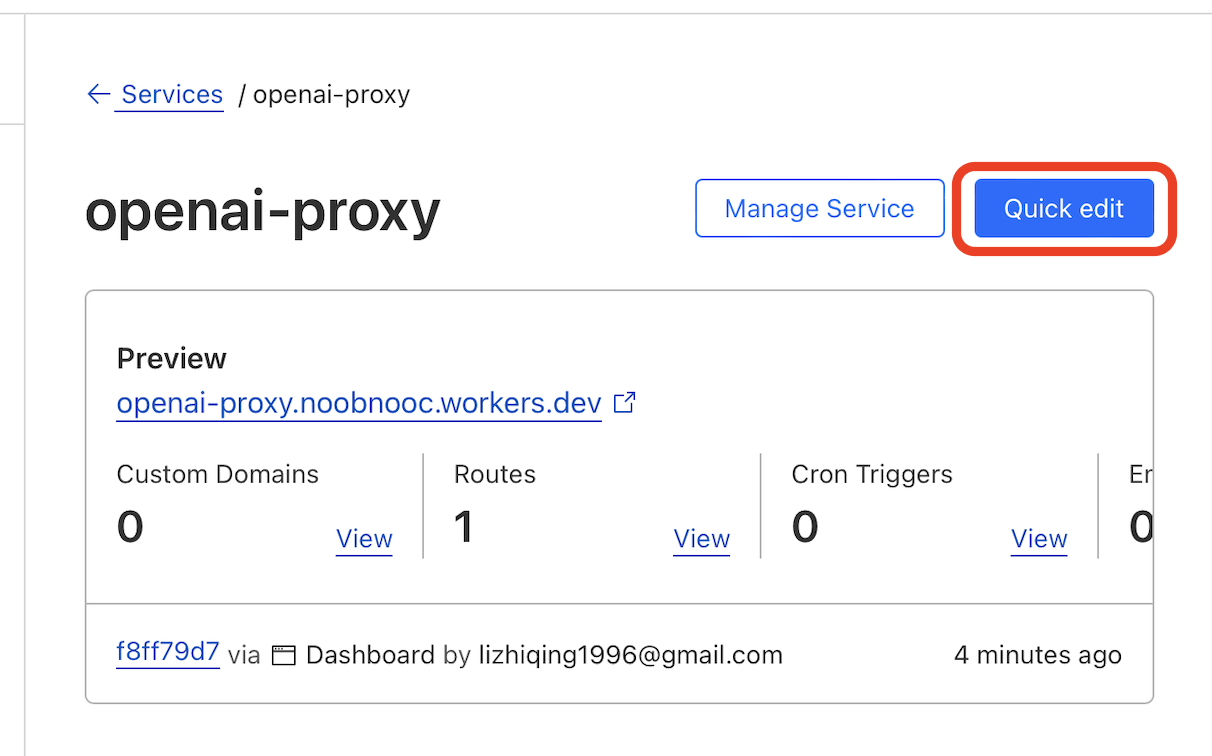
Delete all the existing code in the editor on the left, then copy and paste the following into it:
The simplified code comes from https://github.com/x-dr/chatgptProxyAPI
const TELEGRAPH_URL = 'https://api.openai.com';

addEventListener('fetch', event => {
  event.respondWith(handleRequest(event.request))
})

async function handleRequest(request) {
  const url = new URL(request.url);
  url.host = TELEGRAPH_URL.replace(/^https?:\/\//, '');

  const modifiedRequest = new Request(url.toString(), {
    headers: request.headers,
    method: request.method,
    body: request.body,
    redirect: 'follow'
  });

  const response = await fetch(modifiedRequest);
  const modifiedResponse = new Response(response.body, response);

  // Add a response header to allow cross-origin access
  modifiedResponse.headers.set('Access-Control-Allow-Origin', '*');

  return modifiedResponse;
}
Finally, click “Save and deploy” in the lower-right corner of the editor to deploy the code. In the dialog that appears, click “Save and deploy” again to confirm.
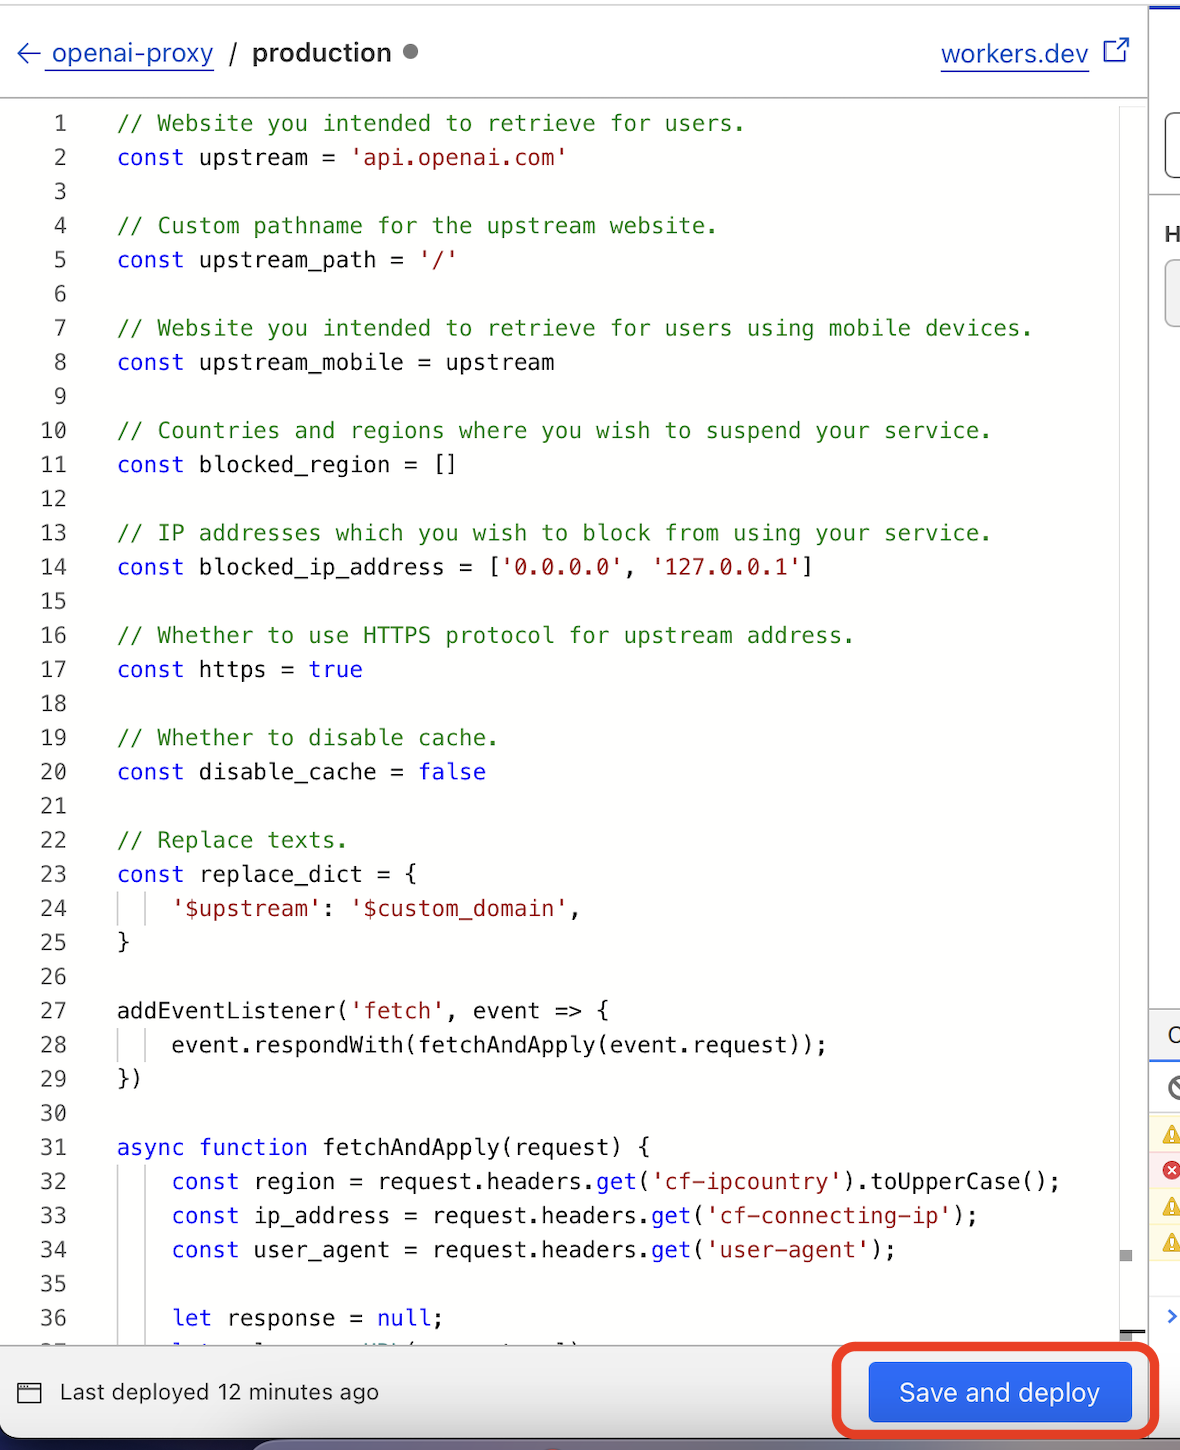
You can now use this worker's address in place of OpenAI's API address. For example, when calling ChatGPT's API, replace https://api.openai.com/v1/chat/completions in the official documentation with https://openai.workers.dev (note that this address doesn't exist; replace it with the address of the Worker you just created).
However, you may find that this still doesn't solve the problem, because Cloudflare Workers' workers.dev domain has also received the GFW's “seal of approval”🥲. Fortunately, only the workers.dev domain is blocked; the ip addresses are still accessible. So we can bind our own domain to the Worker.
Bind a Domain
On the Cloudflare Workers management page, click the “Triggers” tab, then click “Add Custom Domain” under “Custom Domians” to bind a domain.
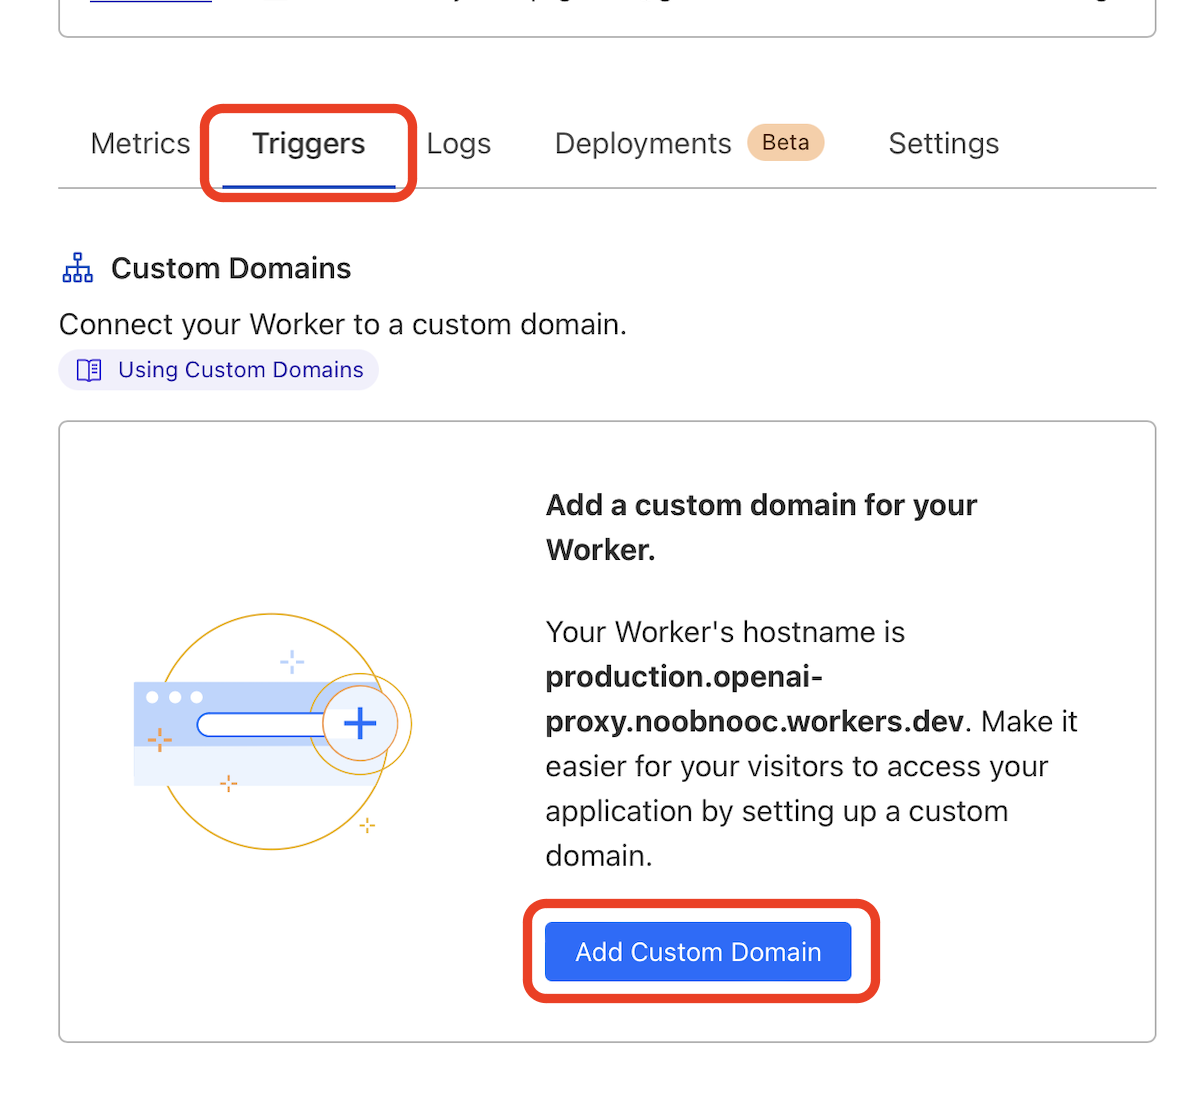
Enter your domain and click “Add Custom Domain”, then follow the instructions to update its DNS records. Since my domain is hosted on Cloudflare, I don't need to change the DNS records manually. If your domain isn't hosted on Cloudfalre, you can configure it yourself by following the instructions. ⚠️ According to the comments, only domains whose NS is hosted on Cloudflare are currently supported. If you don't mind moving it, click “Websites” in the Cloudflare sidebar, then click “Add a Site” and follow the instructions to point your domain's NS records to Cloudflare.
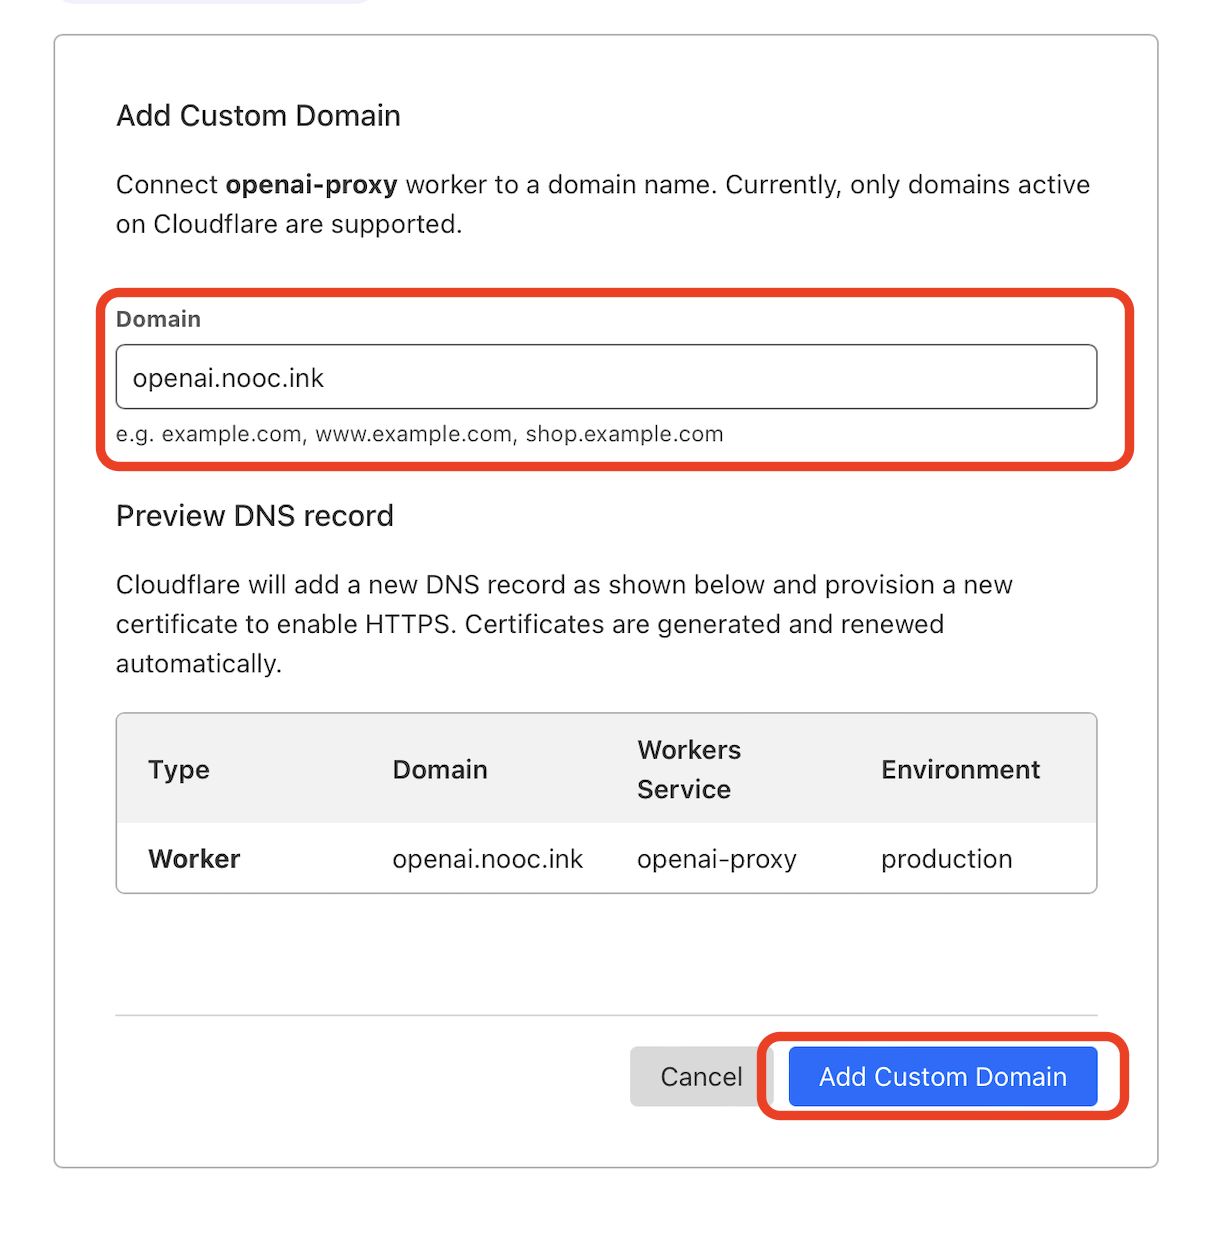
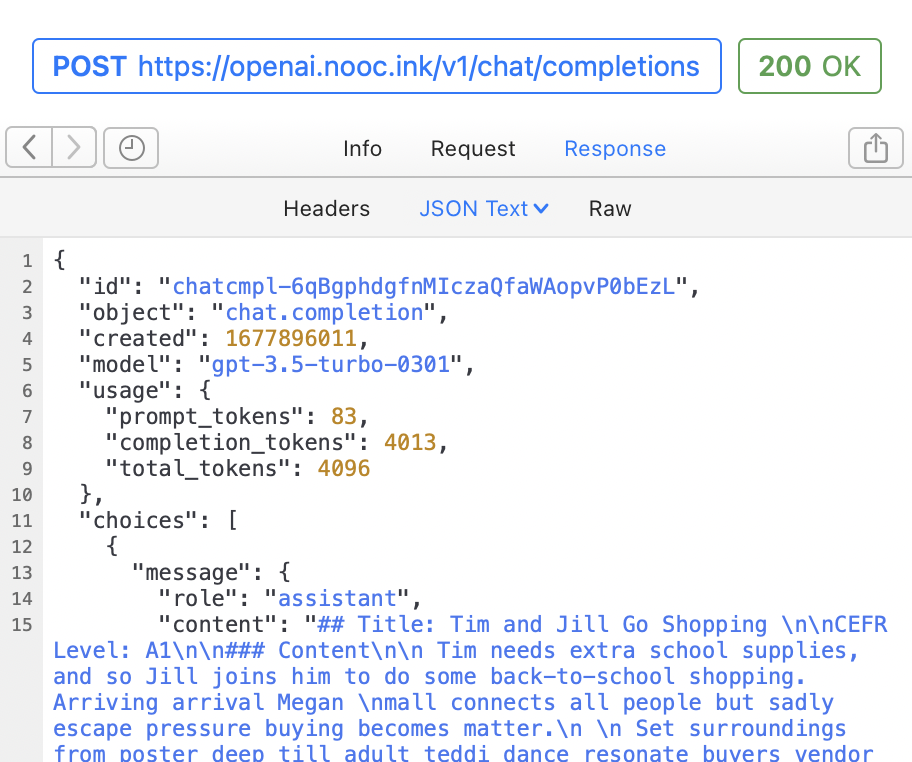
And that’s it! Wait a moment, and you should be able to use your own domain in place of OpenAI’s API endpoint. For example, to call the ChatGPT API in this article’s setup, replace the official API URL https://api.openai.com/v1/chat/completions with my own domain, https://openai.nooc.ink/v1/chat/completions, and keep all other parameters as shown in the official examples. Cloudflare offers 100,000 free requests per day, so light usage is essentially free. ⚠️ Please don’t use my openai.nooc.ink domain, as I may shut it down at any time🤪
Original source: https://github.com/noobnooc/noobnooc/discussions/9. Many thanks to the author!
Last updated 2025-06-25
Comments 0