
Integrating QQ, Github, Google, and Q58 Forum Login into nezha v1 via CZLConnect Oauth2
This post was translated from Chinese by AI. If anything reads oddly, the Chinese original is authoritative. 中文原文
Original: https://www.q58.club/t/topic/312
Create an application
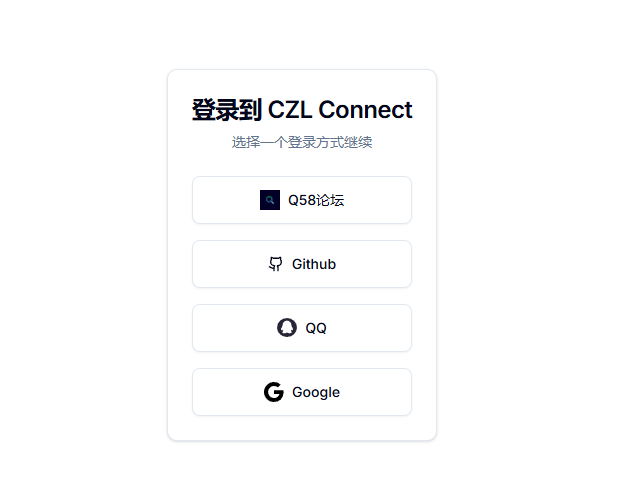
- Open https://connect.czl.net
- Log in with your forum account or github
- Create an application
I deployed the frontend and backend separately, so they have different URLs The callback URL is:
https://回调网址/api/v1/oauth2/callback; this path is fixed I selected "Private" so that only I can log in The application type must be Oauth2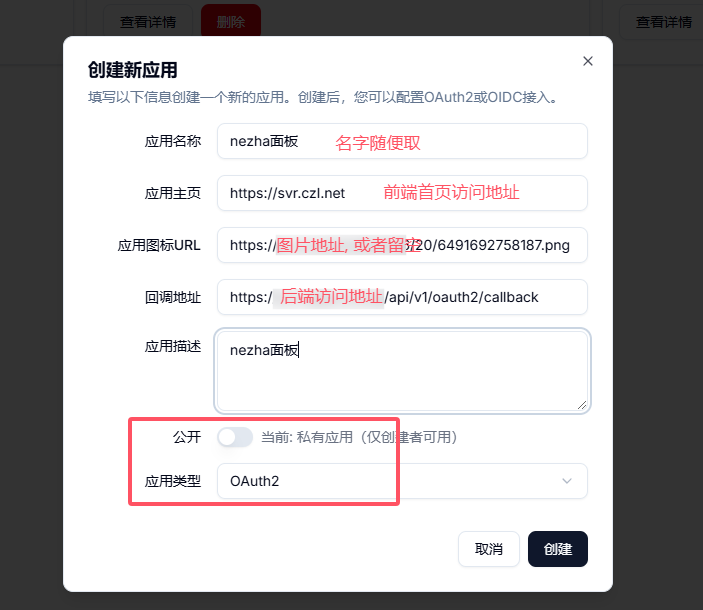
- Get the parameters; you'll need all of these
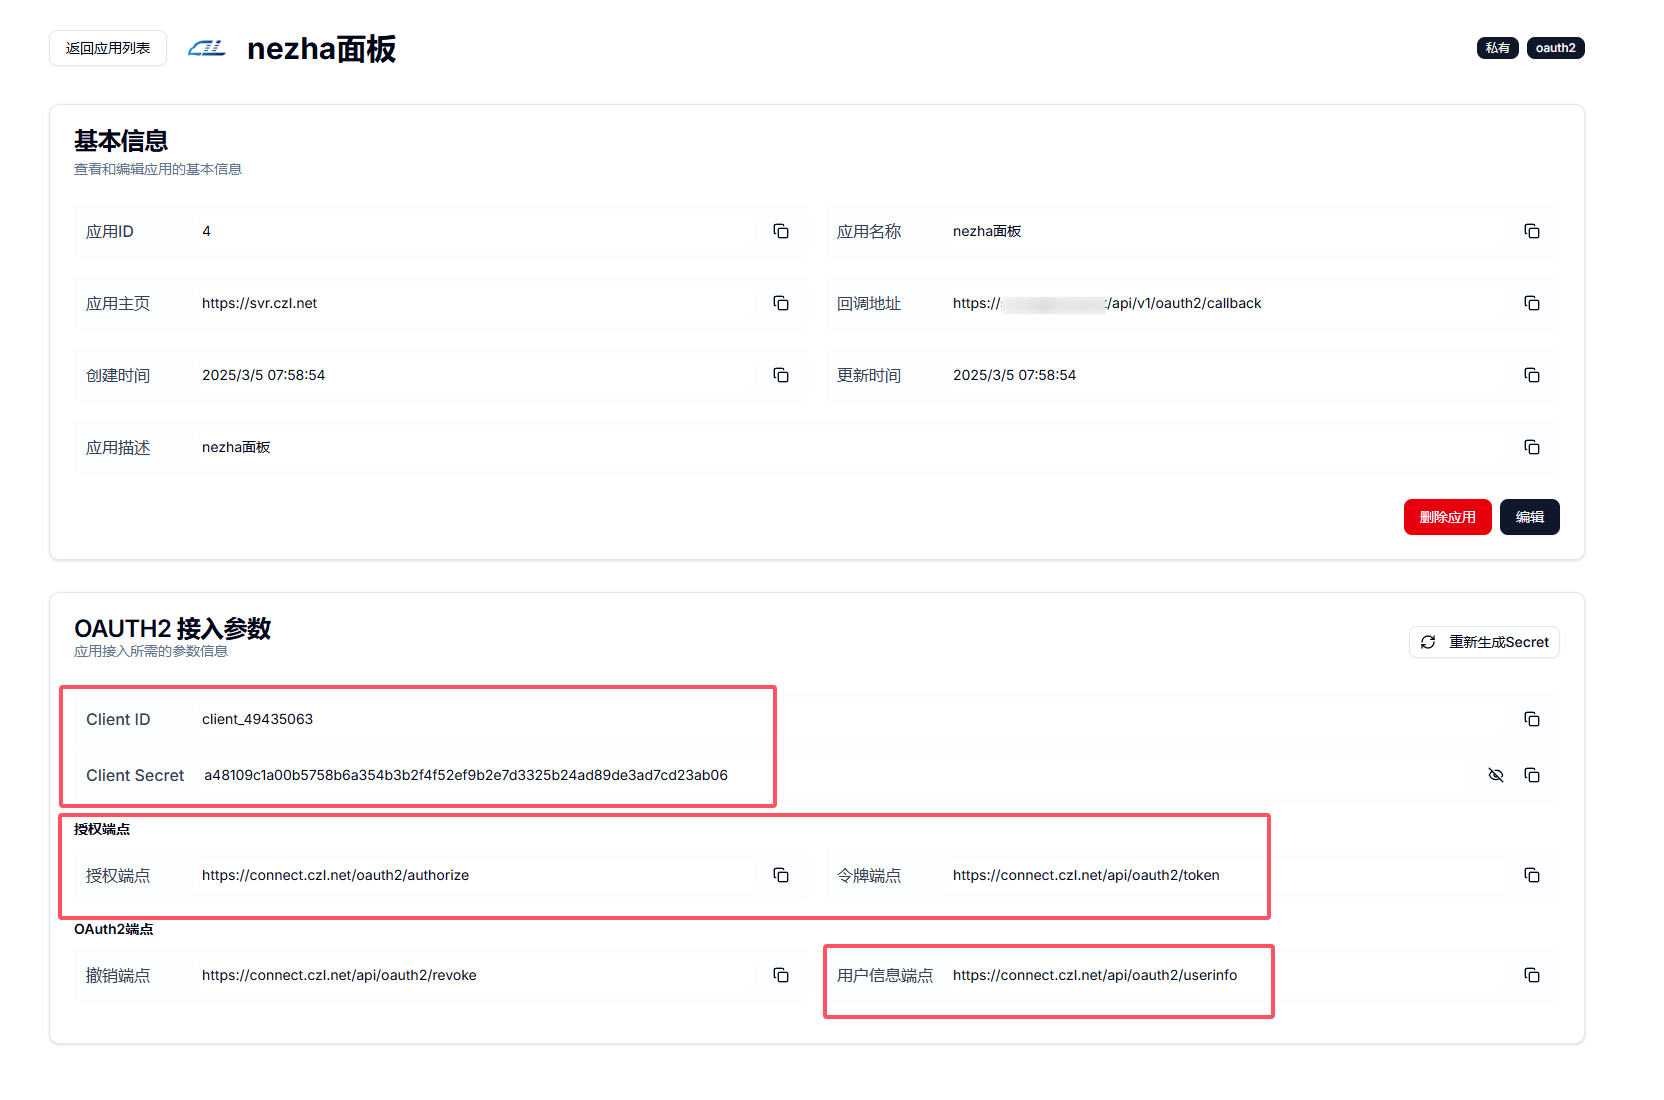
Add the integration settings to the nezha configuration file
- For a standard installation, the file is in
/opt/nezha/dashboard/data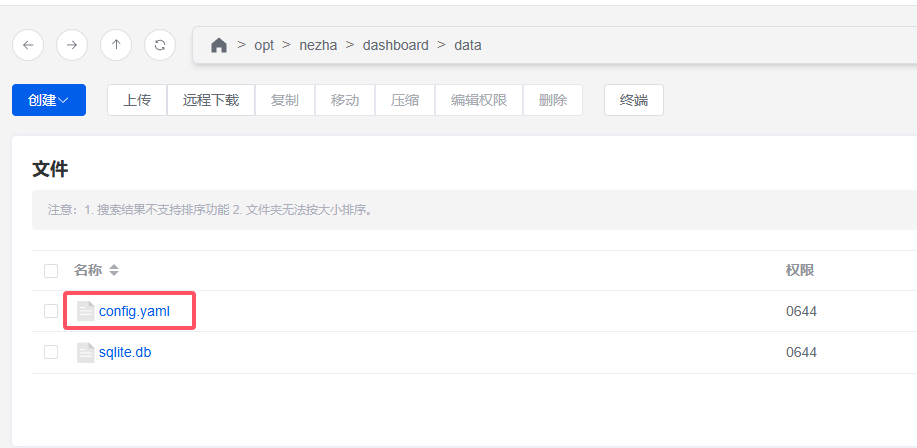
- Edit the file and add the following code
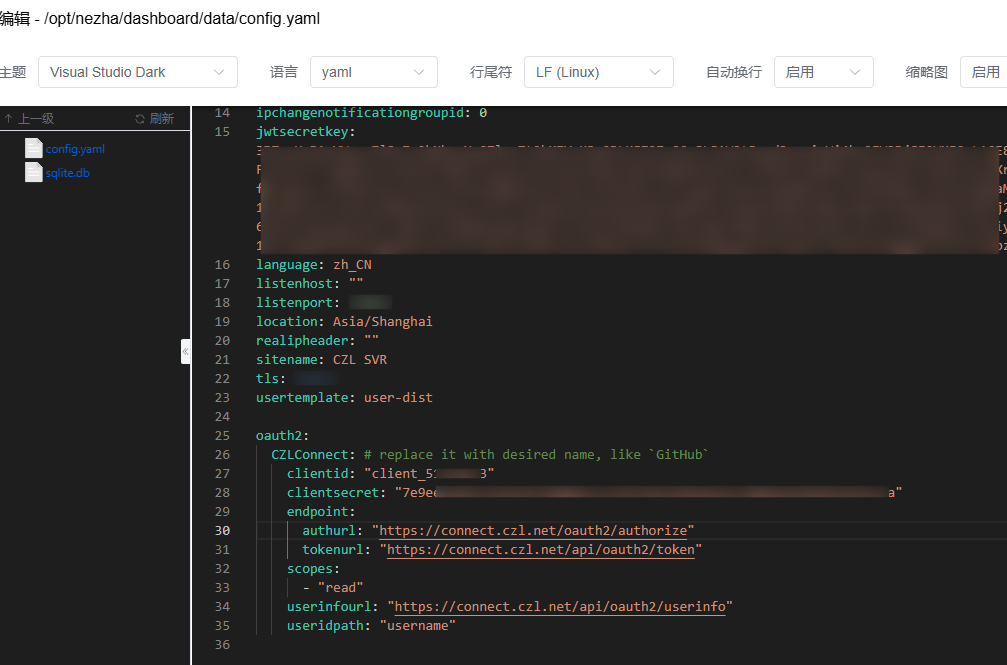
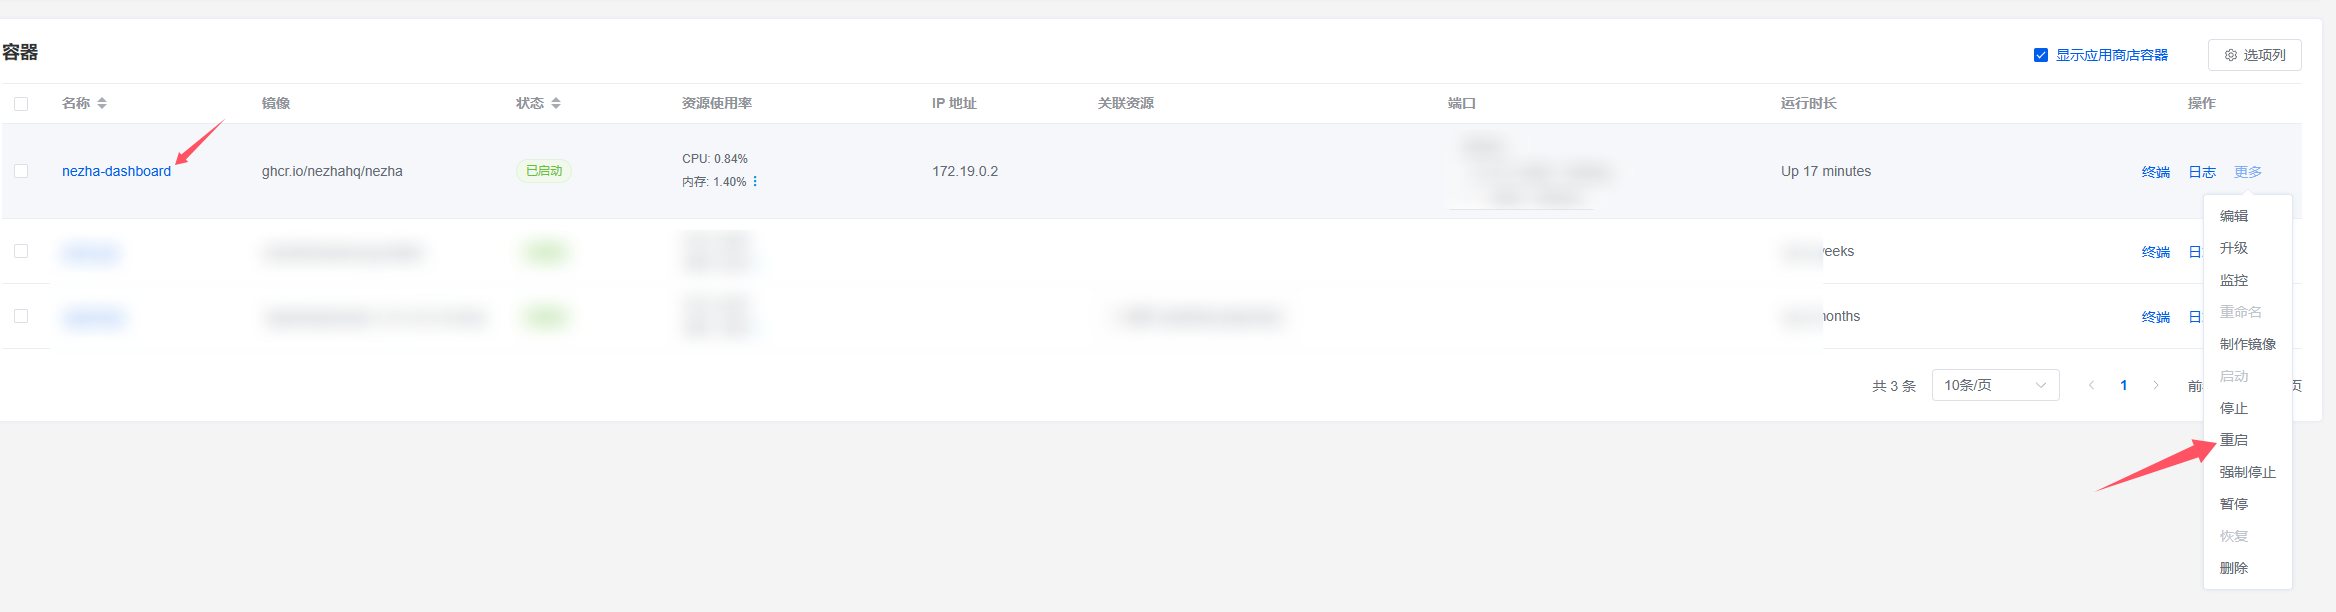
oauth2: CZLConnect: # Integration name; you can customize it clientid: "client_49435063" # ClientID obtained above clientsecret: "a48109c1a00b5758b6a354b3b2f4f52ef9b2e7d3325b24ad89de3ad7cd23ab06" # Secret obtained above endpoint: authurl: "https://connect.czl.net/oauth2/authorize" # Fixed tokenurl: "https://connect.czl.net/api/oauth2/token" # Fixed scopes: - "read" # Fixed userinfourl: "https://connect.czl.net/api/oauth2/userinfo" #Fixed useridpath: "username" # Fixed - Save the file, then restart the nezha docker container
Link oauth2 login in the nezha dashboard, then disable password login
- At
https://nezha地址/dashboard/profile, link oauth2. I've already linked mine, so it showsUnbind; if you haven't linked it yet, it should showBind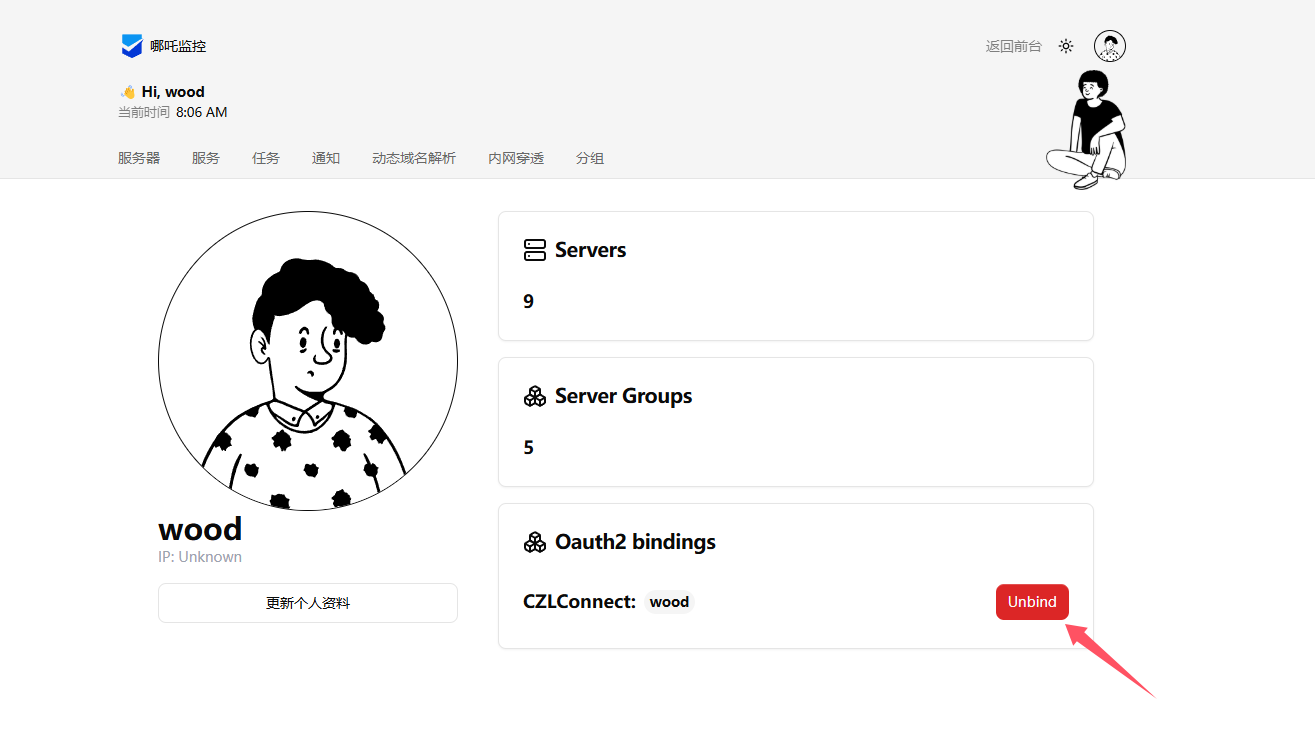
- Click Update Profile and disable password login
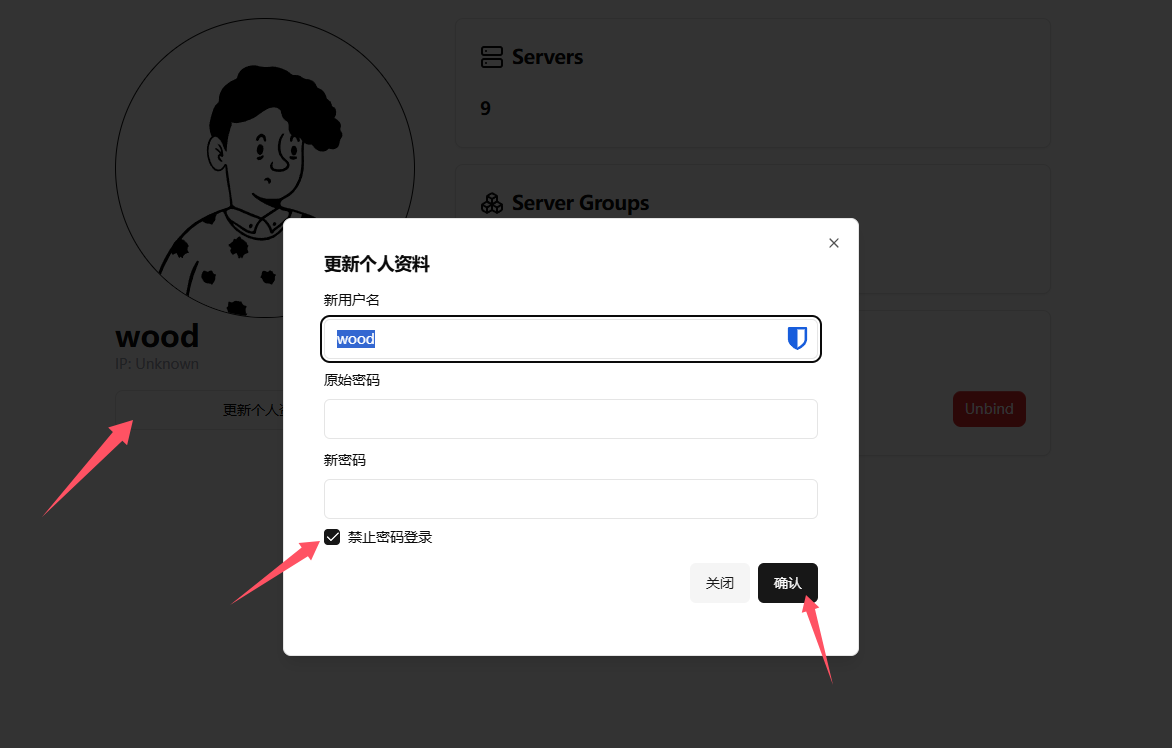
That's it! You can now log in with OAuth2. With password login disabled, attackers can no longer brute-force their way in through password login.
Last updated 2025-03-24
Comments 0