
Add Native CloudFlare DDNS Support to Synology NAS
This post was translated from Chinese by AI. If anything reads oddly, the Chinese original is authoritative. 中文原文
Updated 2025.08.04
https://www.sunai.net/t/topic/53
Old Tutorial
On a Synology NAS, CloudFlare is not listed under Control Panel > External Access > DDNS, so here's a quick guide to adding CloudFlare DDNS support.
Tools and information you need
You need a domain and a CloudFlare account, and the domain must use CloudFlare's NameServer servers.
Find the Zone ID (Zoom ID) on the domain's Overview page.
Create an API token with permission to edit DNS for this domain.
Enable SSH on your NAS and have an SSH client ready, such as Putty or Xshell.
Tutorial
For a domain already using CloudFlare's NS service, find the Zone ID on the Overview page. The English label should be (Zoom ID).
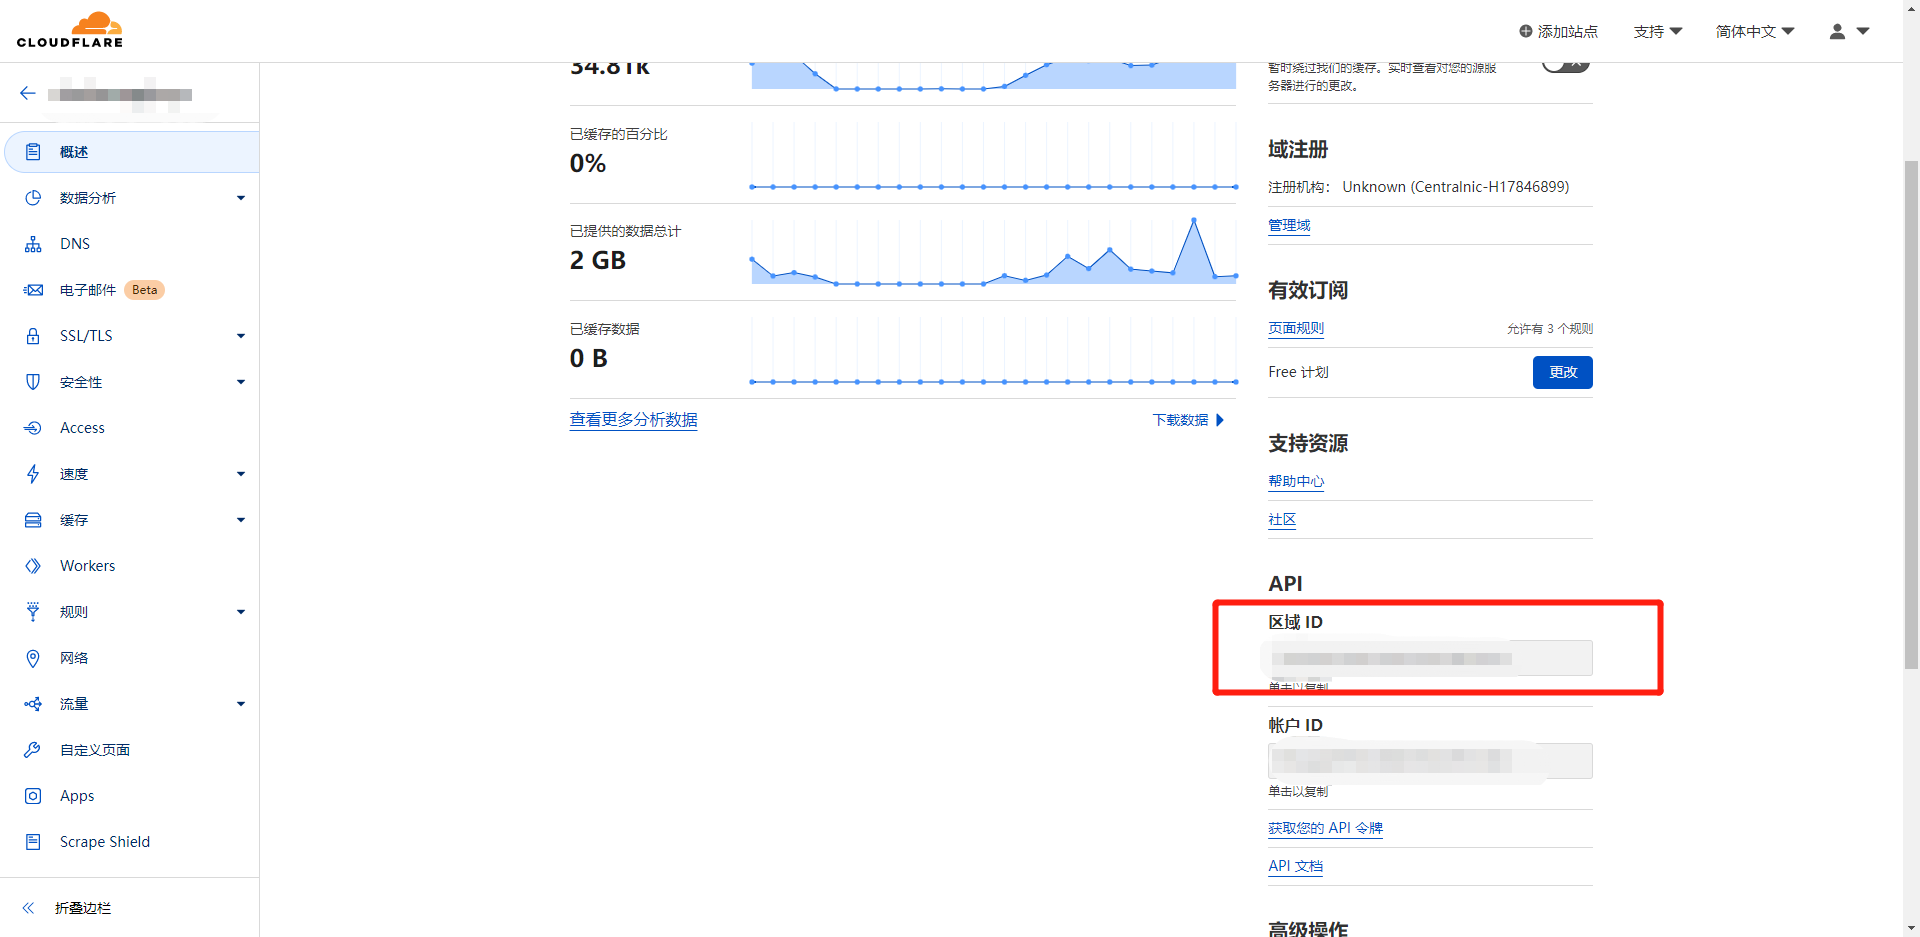
I also recommend using a subdomain. Click DNS in the screenshot above, add a subdomain pointing to any IP address for now, and turn off the proxy cloud.
Create an API token that can edit DNS for this domain.
Go here: https://dash.cloudflare.com/profile/api-tokens
Click Create Token and select Edit zone DNS from the API token templates.
You can generally leave the permissions alone. The defaults should be Zone, DNS, and Edit.
Under Zone Resources, select Include, Specific zone, and the domain you want to use.
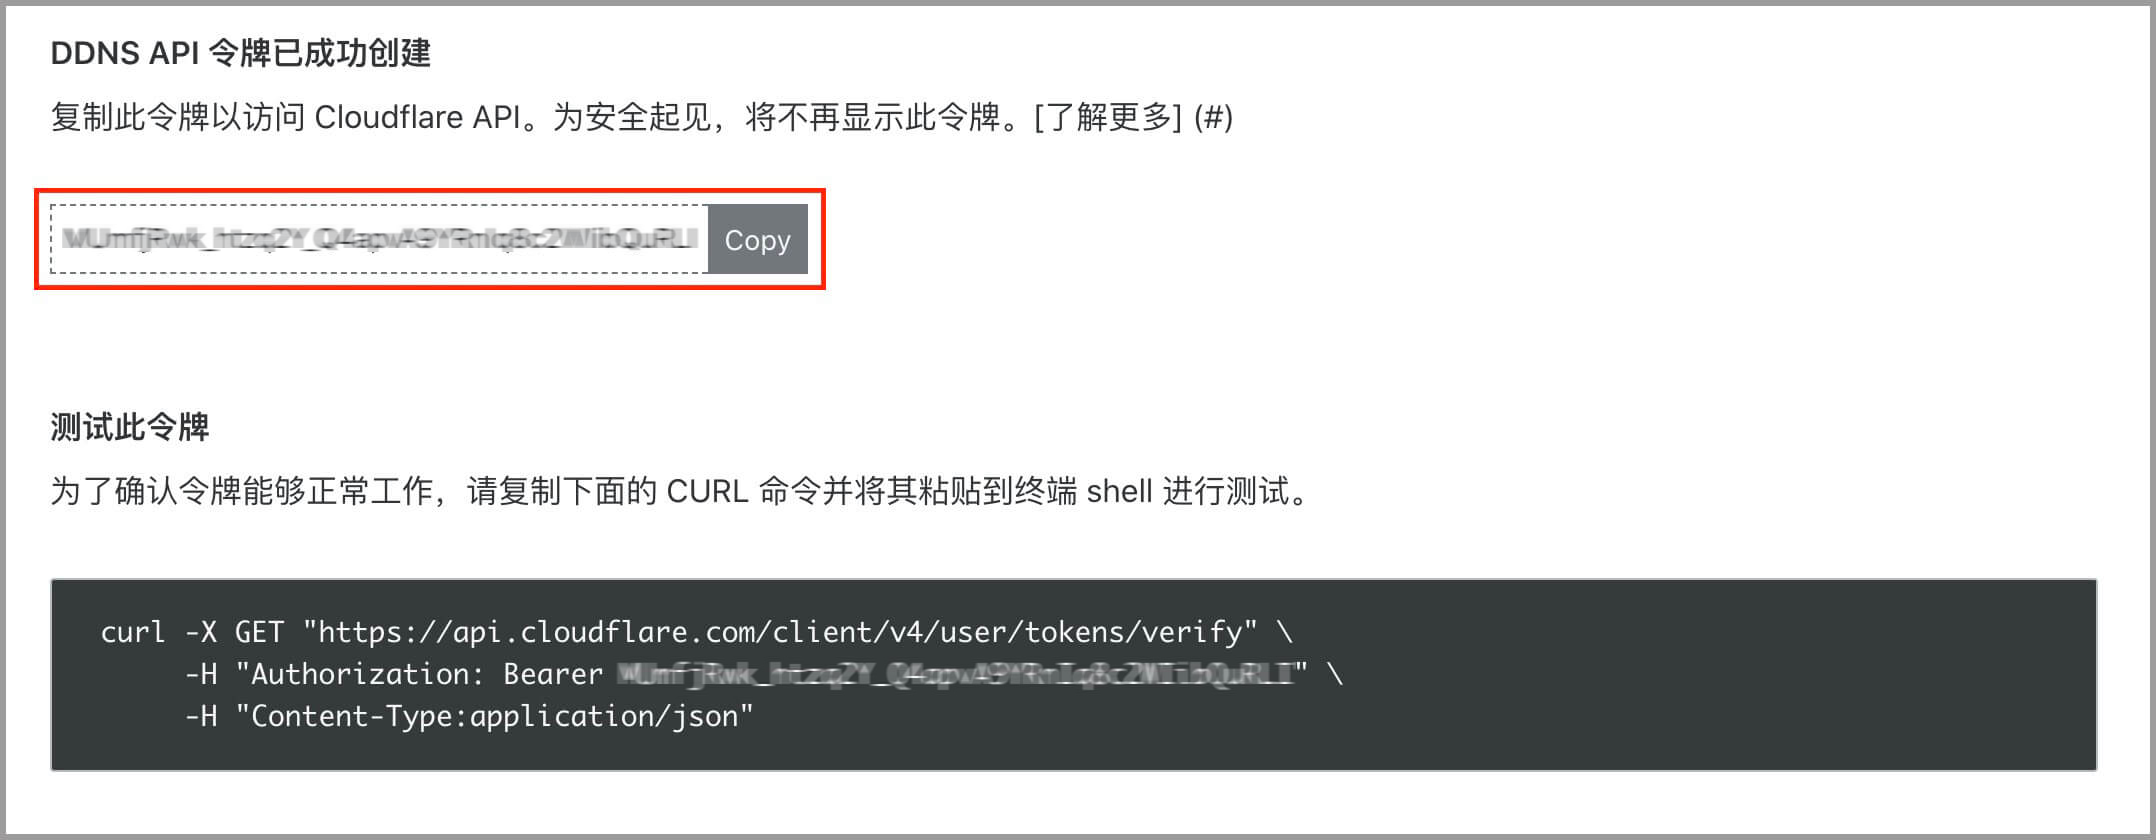
Leave the settings below at their defaults and continue through the steps. A line of text will appear at the end. Copy this line: it is your API token, shown in the screenshot below.
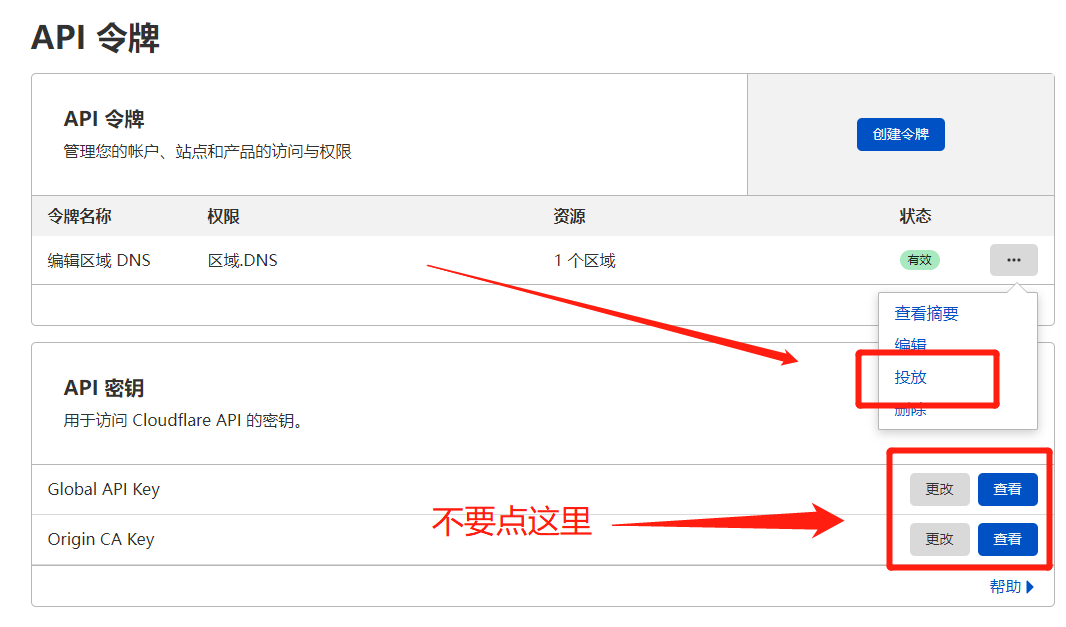
Note: if you forget this API token later, click Roll, as shown below, to recover it. Do not click API Keys below it.
Save the Zone ID and API token mentioned above. You will need them later.
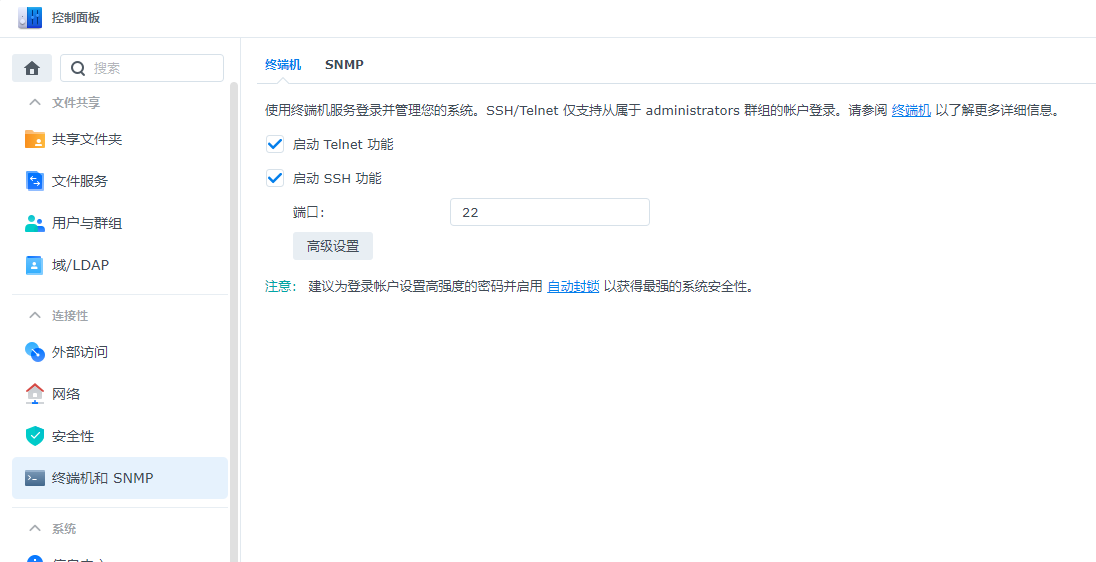
Open your Synology NAS settings and go to Control Panel - Terminal & SNMP.
Enable SSH and click OK.
Download an SSH client, such as the free Putty or the paid Xshell.
Using xsell as an example, open it and create a new session. Set the host to your Synology NAS's IP address and the port to 22 unless you have changed it, then click Log In.
Use the username and password you use to log in to your NAS admin interface.
After logging in, you should see a prompt like thebs@SeriousTest:~$, which means you can proceed.
Once you see this, enter the following.

Enter your admin login password here. Nothing will appear as you type. Press Enter when done. If the password is correct, the prompt will change to root, something like this:
root@SeriousTest:~#
This means you are now using the root account. Next, download and load the script.
Copy and paste the following to download the script and copy it to /sbin/.
The sixth line of the script above contains proxy="true". I recommend changing it with vi. If you don't know how, just use my modified version below.
If you get an HTTP error or something similar, use this version, which already has proxy="false".
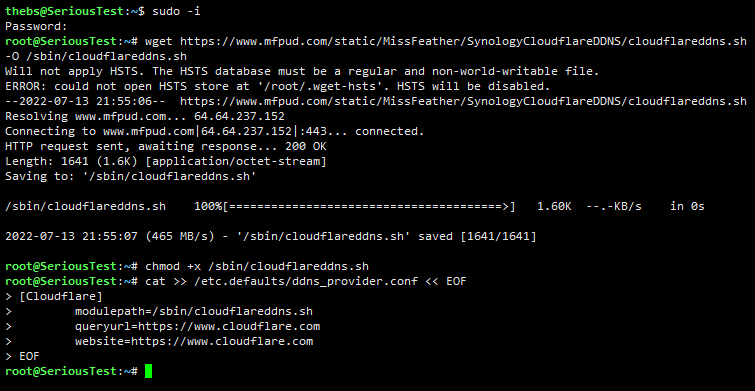
Give the script execute permission.
Add the script to the native DDNS service.
After entering the three items above, your output should look like mine below, indicating success.
Open the Synology admin interface and go to Control Panel > External Access > DDNS.
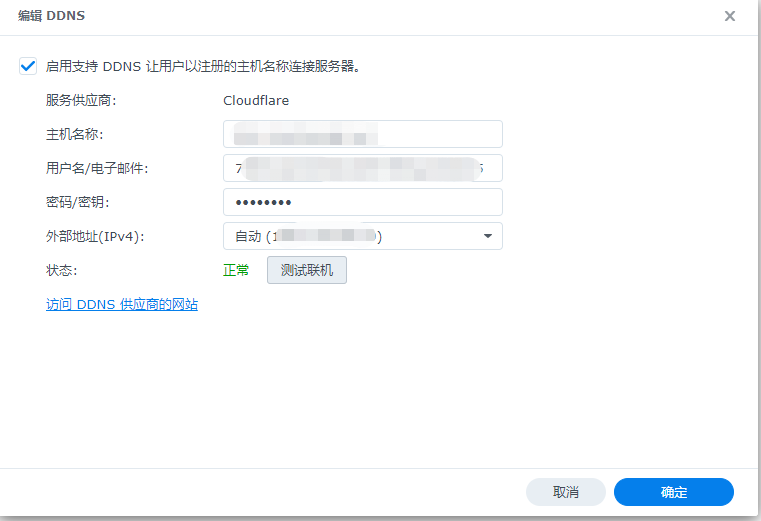
Add a DDNS entry. Enter your subdomain as the hostname, the Zone ID (zoom id) you saved earlier under Username/Email, and the API token under Password.
Click Test Connection. If the result is normal, it worked. Finally, click OK, as shown below.
Finally, open cloudflare and check the domain's DNS records to see whether the subdomain's IP address has been updated.
Last updated 2025-08-04
Comments 0